
Installation Guide: Fitting Your Sheet Metal Window Pan Like a Pro
We understand the importance of properly fitting sheet metal window pans.
Whether you’re a seasoned professional or a DIY enthusiast, achieving a flawless installation requires attention to detail and precision.
In this guide, we’ll walk you through the steps to fit your sheet metal window pan like a pro, ensuring a seamless finish every time.
1. Measure Twice, Cut Once:
Before diving into the installation process, taking accurate measurements of your window frame is crucial. Measure the opening’s width, height, and depth, accounting for any irregularities or obstructions. Double-check your measurements to avoid costly mistakes down the line.
2. Select the Right Material:
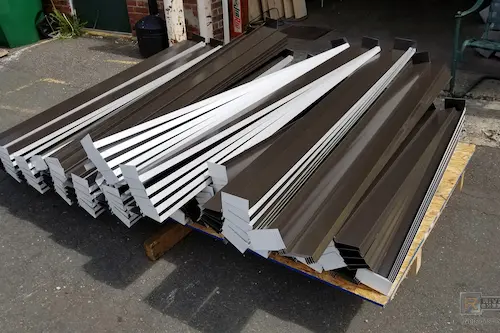
Choosing the appropriate sheet metal for your window pan is essential for durability and longevity. Consider factors such as weather resistance, corrosion protection, and aesthetic appeal. At Michaels Sheet Metal, we offer a variety of high-quality materials, including aluminum, steel, and copper, to suit your specific needs.
3. Prepare the Surface:
Proper surface preparation is critical to ensuring a secure and long-lasting installation. Clean the window frame thoroughly to remove dirt, debris, or old sealant. Smooth out any rough edges or imperfections that could affect the fit of the sheet metal pan.
Get Started
For any questions or concerns, get in touch with our knowledgeable staff today. We would be glad to assist you!
Contact Us Today4. Cutting and Shaping:
Using your precise measurements as a guide, carefully cut the sheet metal to size using tin snips or a metal shear. Take your time ensuring clean, straight cuts, and use a file to smooth out rough edges. If necessary, bend the metal to match the contours of the window frame for a snug fit.
5. Test Fit and Adjustments:
Before securing the sheet metal, perform a test fit to ensure proper alignment and clearance. Make any necessary adjustments to the shape or size of the pan to achieve a perfect fit. Please pay close attention to corners and edges, ensuring they meet flush with the window frame.
6. Sealing and Fastening:
Once satisfied with the fit, it’s time to seal and fasten the sheet metal window pan in place. Apply a bead of high-quality silicone sealant along the perimeter of the window frame to create a watertight seal. Use screws or rivets to securely attach the pan, spacing them evenly for optimal support.
7. Finishing Touches:
After securing the sheet metal window pan, inspect the installation for gaps or imperfections. Apply additional sealant to ensure a seamless finish and maximum weather protection. Finally, clean any excess sealant or debris from the surface for a polished appearance.
By following these steps from Michaels Sheet Metal, you can confidently fit your sheet metal window pan like a pro, enhancing your space’s functionality and aesthetic appeal. Whether tackling a renovation project or building from scratch, our expert tips and high-quality materials will always help you achieve professional results.